I'll show you how to make Halloween party invitations with Inkscape, free computer drawing program. If you like to draw you are welcome to join me.

Halloween is party time. Halloween party or birthday party or any other party. I love them all. And I would like to invite as many people as possible to my party.
What do I need next? Halloween party invitations of course (other party planning will come later).
And I need a lot of invitations. So I decided to make my own Halloween Party Invitations. They are a bit scary, but not too much because I don't want to scare people away from my party.
Will you make invitations with me?
First you'll need Inkscape, a drawing program, which can be downloaded for free.
Then you'll need some time, but don't be afraid, not too much time. Just follow my instructions and in no time you'll have scary Halloween party invitation.
And I did it with computer mouse so you won't need any fancy equipment like graphic tablet or something.
The last thing you'll need is printer and paper. And I think almost everybody has them.
And now let's start, Halloween is almost here.

How to make Halloween party invitations
We'll start with Rectangle tool. You can find it on the left side of Inkscape window. I outlined it with pink.


...and adjust width and height. I made 700 px square. It is about 7.7 inch square.

And now we'll color it. I left the fill with no paint...

...and for outline I used red color #f00f0f.

Two "ff" at the end are there for transparency.
If you make it "00", it is transparent, and if you make it "ff", it is not transparent.
Outline is 10px wide.

Now go to File - Document Properties.
A little window opens. Look for "Resize page to content" (I outlined it with pink).

Now click the button "Resize page to drawing or selection"

And you'll find this little red square on your monitor.

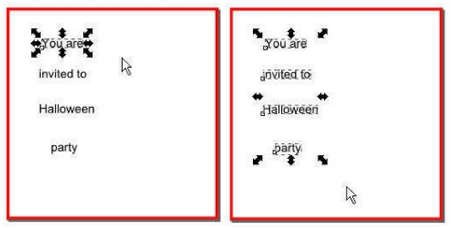
Now let's find Text tool on the left side.

Click the Text tool and start writing.
Make only one or two words a line, and then go to new line with mouse.

Now search for the Selection tool. It is a arrow at the top of the buttons on the left side.

Then click to the first line.

And now click all lines AND hold Shift at the same time. Or just go to Edit - Select All (Ctrl and A).
Here we'll change font size to 72px and font family to MisterEarl BT.

Now it looks like this.

Now we'll prepare our letters for effects.
Go to View - Zoom - Zoom 1:2 to enlarge our image. This way you'll see better what is going on.

Click on the letters in the first line. Go to Path - Object to Path. Then Object - Ungroup...
You can see that each letter is separated from others and you can change color or font of each letter.

Now go to the Path - Union. Letters are together again.

We'll rotate all letters together. Click once on the letters and you can see that arrows around them change.
We can rotate our image with these arrows. Go to green arrow and drag it up or down.

And we rotated our letters. We'll repeat that with all lines.

If you want to enlarge the letters, click on the green arrow AND Ctrl.

If you just want to make it wider, drag arrow without Ctrl.

Now we'll change color

We'll just change fill to red, color #ef0a0a.

And effects of course. Go to Filters - Protrusions - Dripping.

This is how it looks...


And the result...

Now change background color to black, color #000000.

Our invitation with black background...

We can add a little clip art. You can make it yourself, or look for it on clker.com or openclipart.org or somewhere else.

We add it to our invitation with File - Import.

We have to save it too. Go to File - Export. Click to button Page, name your file and Export.

And done.

All images by Pippi Dust.
No comments:
Post a Comment